
This post may contain affiliate links. Please read our disclosure policy.
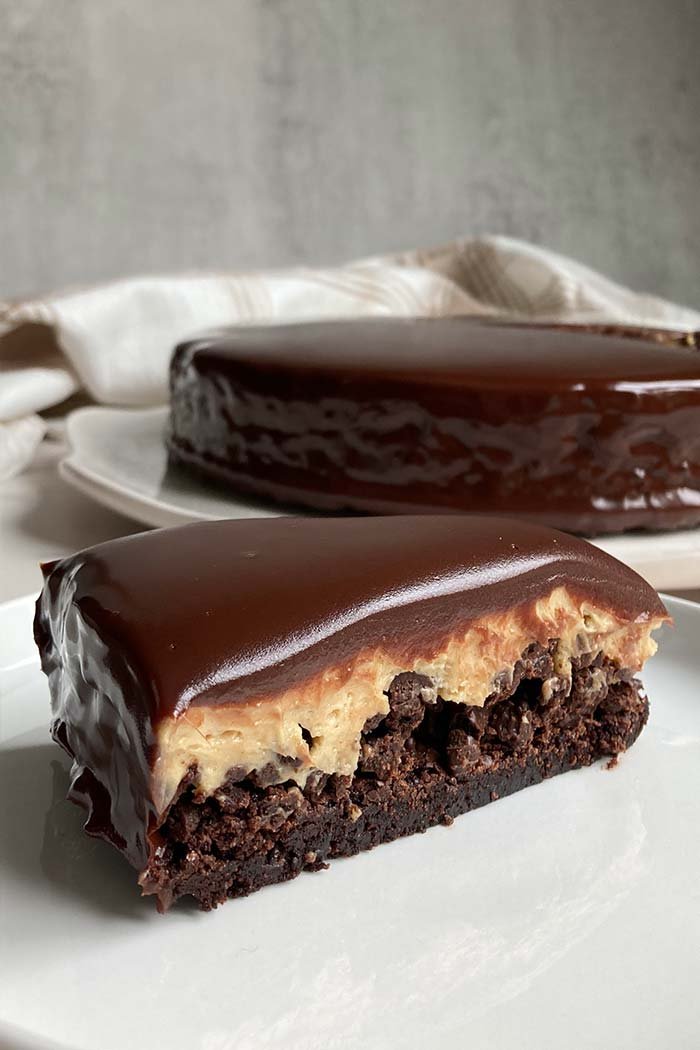
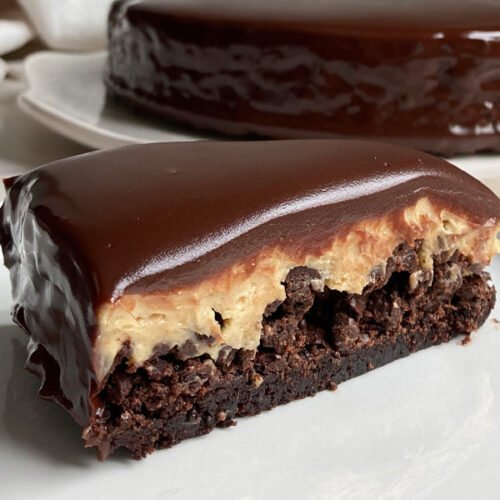
A brownie base topped with crunchy chocolate cookies and peanut butter mousse, coated in a silky chocolate ganache.
Layered Dessert or Cake
This dessert may have “cake” in the name, but there’s actually no cake in it. The reason behind this is simply for ease. Calling it “peanut butter mousse brownie crunch layered dessert” is accurate, but it’s also a mouthful. Since it’s presented and sliced like a cake, it’s easier to simply call it a peanut butter mousse brownie crunch cake. It also seems to be what people naturally call it. Whenever I’ve brought this to gatherings it is always referred to as a cake (“can you please make that cake again”, “I need the recipe for that cake”, etc.), so it just seems to make more sense to refer to it as a cake.
The Layers
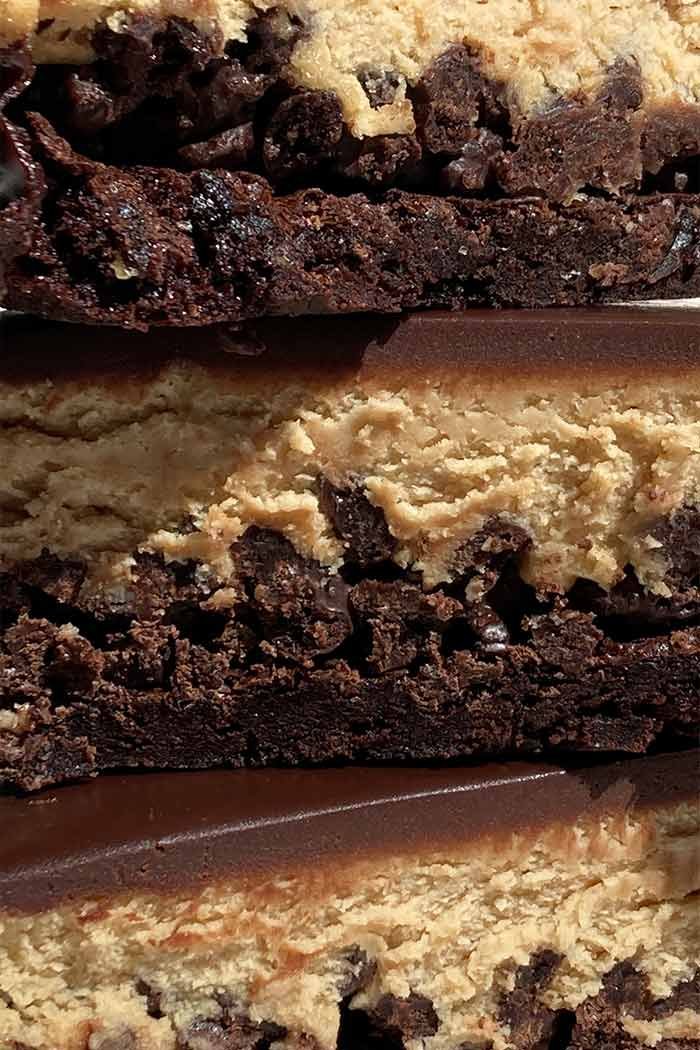
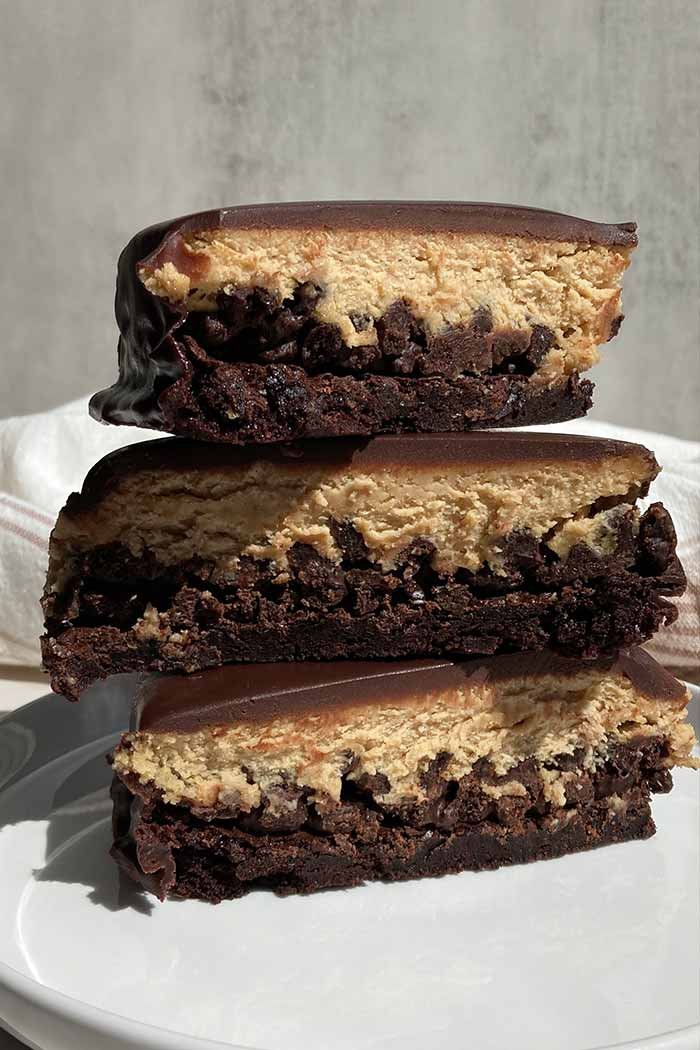
This dessert starts off with a brownie base that is so rich and chewy and full of deep chocolate flavor. It’s then topped with rich chocolate cookie pieces that add a wonderfully crispy texture to each and every bite. A light and creamy peanut butter mousse follows, which adds some lightness and freshness that complements the chocolate layers beautifully. To finish it off, ganache is poured over the “cake” enrobing it in smooth and silky chocolate.
Why You’ll Love This Peanut Butter Mousse Brownie Crunch Cake
Flavor Combination – if you love chocolate and peanut butter together, this is the dessert for you! Chocolate and peanut butter is one of those classic flavor combinations that can’t be beat and this dessert combines the two in a fun and elevated way.
Textures – each layer has its own texture, from the chewy brownie, the crunchy cookie pieces, the light and creamy peanut butter mousse, and the silky smooth chocolate ganache. Each bite will have you wanting more.
Restaurant-Style Dessert – with a variety of layers, each with its own texture and flavor, this is a dessert that could easily be served in a restaurant or made in a bakery, but you can make it right at home! It is sure to impress!
Endless Variations – you can choose to alter this dessert in a variety of ways. If you don’t want to make each layer from scratch, you can use store-bought components as described in the FAQ section. You can also change the flavor by using different cookies, switching the mousse flavor, or using a different chocolate for the ganache.
FAQ
Can I use a boxed brownie mix for the brownie layer?
Yes, you can certainly choose to use a boxed brownie mix to make the brownie layer, but the amount that the boxed mix makes will need to be taken into consideration. This brownie recipe was specifically made to produce a thin brownie layer in a 9-inch springform pan. If your standard box mix makes a 9 x 13 inch tray of brownies, you’ll want to prepare the batter according to the directions on the box and use about half of it in this recipe for a similar brownie base. Using all of the batter in the 9-inch round springform pan will create a thicker brownie layer and may negatively impact the texture; it may bake up too soft to support the dessert or the edges will be overdone by the time the center is cooked through.
Can I use store-bought cookies for the cookie crunch layer?
Yes, you can use store-bought cookies of your choosing. If you do, I would recommend a crispier cookie and coating the cookie pieces in magic shell topping to ensure they stay crisp in the final dessert. You can use store-bought magic shell topping or make it using the magic shell recipe listed in the “cookie crunchies” section of the recipe below.
This recipe uses homemade crispy chocolate wafer cookies that are similar to the, now discontinued, Nabisco Famous Chocolate Wafers. They have a deliciously deep chocolate flavor, crispy texture, and are easy to make. If you’re looking for a similar store-bought option, these may work: Dewey’s Bakery Brownie Crisp Moravian Cookie Thins, Oreo Thins, Tate’s Bake Shop Double Chocolate Chip Cookies, and Mandy’s Cookie Thins. I have not tried any of these personally, but other bakers online have used these as substitutions for the Nabisco wafers.
Can I use natural peanut butter in the mousse?
I recommend using a conventional peanut butter, like Skippy, in this recipe. The oils in natural peanut butters separate which can cause varying results when using it in the mousse layer.
FAQ continued
Why do you allow the ganache to cool before coating the dessert?
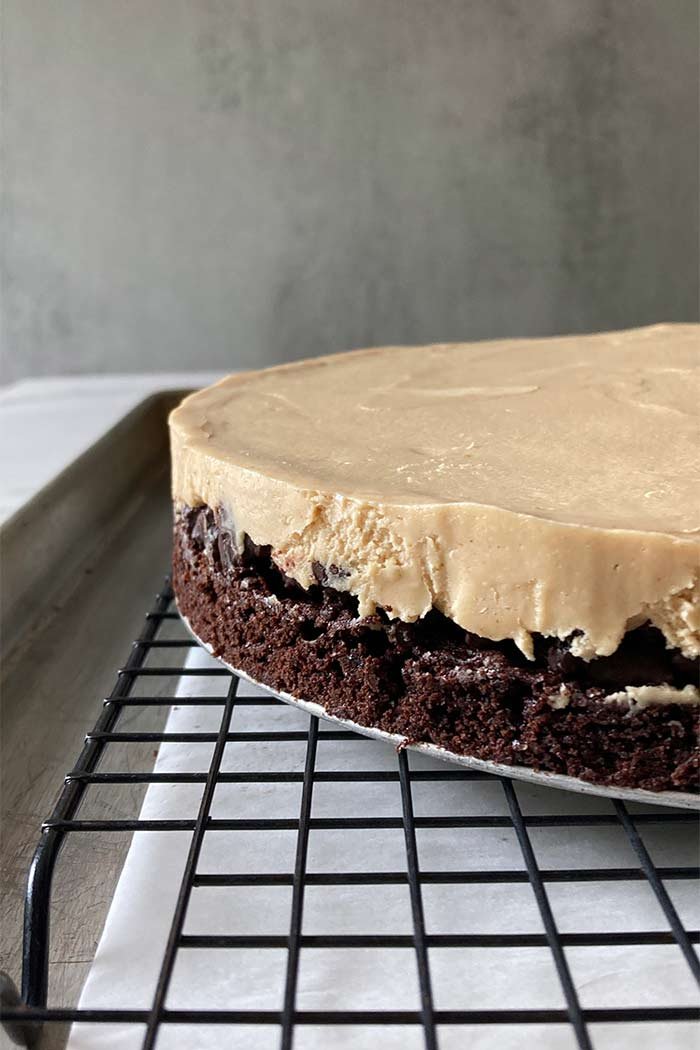
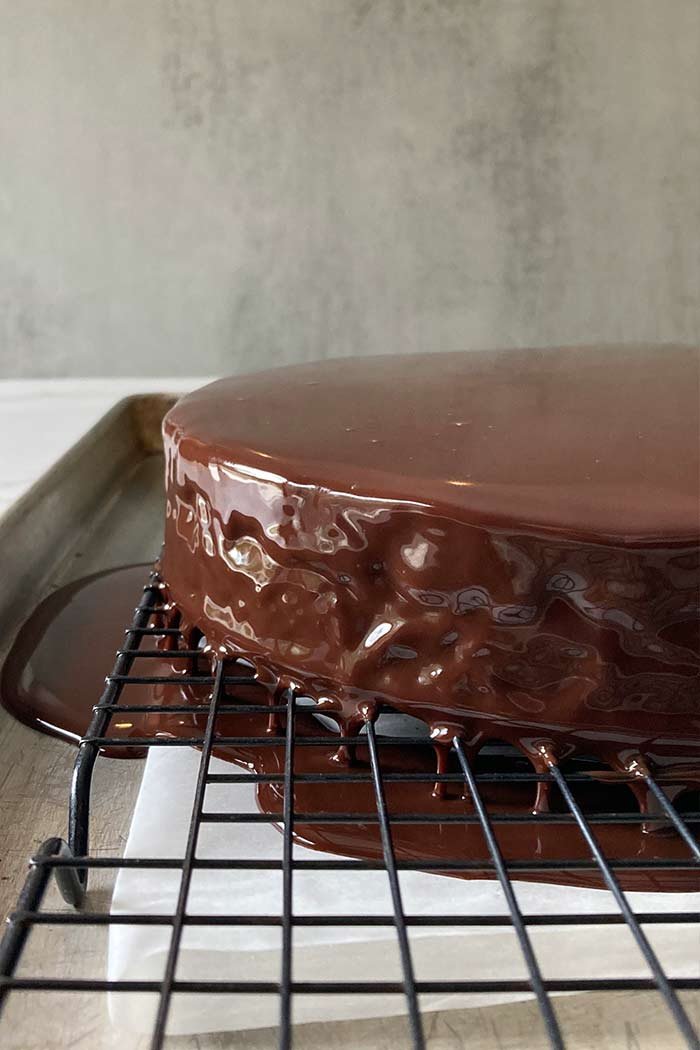
There are several reasons that we allow the ganache to cool slightly before using it to coat the dessert. If the ganache is too hot, it has the potential to melt or soften the mousse layer, which is something we want to avoid. Cooling the ganache also allows it to thicken slightly to create a better consistency. Hot ganache would be too thin and would run right off the dessert, creating a super thin ganache layer. Cooling the ganache allows it to be more viscous, creating a thicker layer with a beautiful smooth and glossy finish.
How can I get clean slices?
Using a sharp knife and wiping it clean in between each cut can help you get beautifully clean slices of this layered dessert.
Do I need a springform pan?
A springform pan allows you to remove the sides of the pan and coat the top and sides of the dessert in ganache. Removing the sides of the pan also allows the dessert to be sliced easily.
Note – I have not tried this personally, but one potential alternative that you could try is the following: since a 9-inch springform pan and an 8 x 8 inch square pan have nearly the same surface area, you may be able to use an 8 x 8 inch square pan to turn this recipe into bars. I would recommend lining the pan with parchment paper, allowing it to overhang the sides of the pan. Then, follow the recipe as normal. After you’ve added the mousse layer and allowed it to chill, this is where things would change from the written recipe. At that point, I would reduce the amount of the ganache by half, pour it over the top of the bars, and allow it to set. You can then, in theory, lift the dessert out of the pan by the overhanging parchment paper and slice into squares.
You May Also Like
- Soft Peanut Butter Cookies
- Cream Puffs with Pastry Cream Filling
- Homemade Mocha Cookie Crunch Ice Cream
- Easy Peanut Butter Stuffed Brownies
- Brown Butter Toffee Chocolate Chip Cookies
Equipment
For this recipe, you’ll want a 9-inch springform pan so you can easily release the dessert and be able to easily cover the top and sides with ganache. I also find a small offset spatula useful to loosen the cake from the sides of the pan and smooth the mousse layer before adding the ganache.
A wire cooling rack is nice to have for coating the dessert in ganache. It allows the excess ganache to collect in a baking sheet underneath instead of pooling at the sides of the cake.
Peanut Butter Mousse Brownie Crunch Cake

Equipment
- 9 inch springform pan (linked in blog post)
- small offset spatula (linked in blog post)
Ingredients
Brownie Base Layer
- ¾ cup + 2 tbsp (175 g) sugar
- 2 tbsp (30 g) boiling water
- 1 egg
- ¼ cup (50 g) neutral oil
- 2 tsp vanilla extract
- ½ tsp salt
- ½ cup (45 g) dutch-process cocoa powder
- ½ cup (60 g) flour
Cookie Crunchies:
– Wafer Cookies
- 6 tbsp (85 g) butter, melted
- ½ cup (100 g) sugar
- ½ tsp vanilla extract
- ⅛ tsp baking soda
- ⅛ tsp salt
- ¼ cup (25 g) dutch-process cocoa powder
- ½ cup + 2 tbsp (75 g) flour
– Magic Shell
- 4 tsp (16 g) refined coconut oil
- ½ cup (90 g) semi-sweet chocolate chips
Peanut Butter Mousse
- 2 cups (485 g) heavy cream
- 1 cup (260 g) creamy peanut butter (Skippy or Jif style)
- ½ cup (100 g) sugar
- ¼ tsp salt
Chocolate Ganache
- 1 ½ cup (284 g / 10 oz) semi-sweet chocolate chips
- 1 cup (242 g) heavy cream
Instructions
Prepare the Wafer Cookies
- In a bowl, mix melted butter, sugar, vanilla, baking soda, and salt until well combined.
- Add cocoa powder and flour and mix until fully incorporated.
- Form dough into a log about 5 inches long. Wrap tightly in plastic wrap and refrigerate until firm. Meanwhile, prepare the brownie layer.
Brownie Base Layer
- Grease a 9-inch springform pan and preheat oven to 350℉.
- In a bowl, mix boiling water and sugar for 1-2 minutes to dissolve the sugar.
- Add egg and whisk until well combined.
- Add oil, vanilla, and salt. Mix until combined.
- Add cocoa powder and flour and mix until incorporated. Spread into the prepared pan.
- Bake for 18 – 20 minutes until the top is set and a toothpick inserted 2 inches from the edge comes out with a few moist crumbs. Place on a wire rack to cool completely.
Cookie Crunchies
- Once firm, remove the cookie dough log from the fridge and cut into thin ⅛-inch slices. Place on a parchment-lined cookie sheet.
- Bake for 8-12 minutes, or until cookies appear slightly deflated and the kitchen smells of chocolate. Allow cookies to cool on the cookie sheet for 1-2 minutes before transferring to a wire rack to cool completely.
- While the cookies cool, prepare the magic shell topping:
- Add coconut oil to a microwave safe bowl and heat until fully melted.
- Add chocolate chips and stir until melted and fully incorporated. You may have to place the mixture back into the microwave for short intervals, stirring in between, to get the chocolate to melt fully into the coconut oil.
- Once the cookies are fully cool and crisp, break them into small pieces and place them in a bowl. Pour the magic shell topping over top and stir until evenly coated.
- Spread the cookie crunchies over the cooled brownie layer to form an even layer. Place in the fridge to set as you prepare the peanut butter mousse.
Peanut Butter Mousse
- Pour cream into a bowl and whip with an electric mixer until the whisk begins to leave visible lines in the cream.
- Add sugar and salt and continue to whip until the mixture becomes matte and begins to resemble whipped cream.
- Add peanut butter and whisk until just combined.
- Using a small offset spatula, spread the mousse evenly over the cookie crunch layer. Cover and place in the fridge overnight to set and chill completely.
Prepare the Chocolate Ganache
- Add heavy cream and chocolate chips to a microwave safe bowl or measuring cup. Microwave in 15-20 second intervals, stirring well in between, until mixture is smooth and free of lumps. If needed, let the mixture sit for 1-2 minutes between intervals so the residual heat can melt the remaining chocolate, to prevent overheating.
- Once fully melted and smooth, allow to cool to room temperature.
Glazing the Dessert
- Remove the pan from the fridge and run an offset spatula or thin knife around the edge of the dessert to ensure it's released from the sides of the pan.
- Place a wire cooling rack on top of a baking sheet or a sheet of parchment paper; this will catch any excess ganache. Place the springform pan on top of the wire rack. Unlatch the springform pan and remove the outer ring.
- Use an offset spatula to clean up any rough edges and smooth out the top, if necessary.
- Stir the room temperature ganache, then pour the ganache over the center of the cold dessert, allowing it to evenly coat the top and flow down over the sides.
- Allow the dessert to sit at room temperature for a few minutes as the ganache drips and settles, then place in the fridge to set.
- Once the ganache has set, slice and serve cold.
Made this recipe? I’d love to hear what you think!
Leave a star rating or a comment below (or both!) to share what you thought. Your feedback helps other bakers know what to expect when they try this recipe. Thank you for taking the time to share!
If you try out this recipe, I’d love to know what you think! Please leave a comment with a rating below; it helps support the blog and helps others decide if they should try out this recipe too. If you share a photo of your creation on Instagram, please use the hashtag #BrooksideKitchen and tag @BrooksideKitchen


